
SOLAR AGRICULTURE · COMPLETE GUIDE
Solar Panel Installation Guide for Farm Irrigation & Crop Watering
Learn how to plan a solar-powered irrigation system, select compatible solar panels and water pumps, size your equipment, and deliver water to crops efficiently.
Suggested image: Solar panels powering a water pump beside green crop rows, irrigation pipes, and a farm water tank.
Recommended dimensions: 1200 × 636 pixels

Water is essential for healthy crops, but delivering it to the right place at the right time can be expensive. Farms that rely on grid electricity or diesel-powered water pumps may face high operating costs, fuel price changes, or unreliable access to power.
Solar-powered irrigation offers another option. By converting sunlight into electricity, a photovoltaic system can operate a compatible water pump and move water from a well, reservoir, river intake, or storage tank to agricultural fields.
A well-designed solar panel installation for farm irrigation can reduce dependence on conventional electricity and diesel fuel. It can be particularly useful in sunny agricultural regions where water is available but grid access is limited or expensive.
However, solar irrigation requires more than installing a few panels beside a pump. The system must be sized according to the farm’s daily water demand, pumping height, pipe losses, available sunlight, and irrigation schedule.
To install solar panels for farm irrigation, estimate the daily water requirement, calculate the total pumping head, select a suitable pump, determine the required solar array size, and install compatible pumping controls and electrical protection. Test the system’s actual water delivery before relying on it for crop irrigation.
1. How Solar Irrigation Systems Work
A solar irrigation system uses electricity generated by photovoltaic panels to operate a water pump. The pump moves water from its source through pipes, filters, and irrigation equipment to the crops.
Some systems operate mainly during daylight hours, while others use a water storage tank or battery to make water available at different times.
The Basic Solar Irrigation Process
Convert sunlight into DC electricity
↓
Controls compatible pump operation
↓
Moves water from the source
↓
Direct water to the crop area
↓
Receive the required irrigation water
The exact equipment depends on the pump type and system design. Some solar pumps use a dedicated controller and connect directly to a compatible solar array. Other pumps require an inverter or a different electrical arrangement.
Always follow the pump manufacturer’s wiring diagram and electrical specifications rather than assuming that every pump can connect directly to solar panels.
2. Main Components You Need
Before purchasing equipment, understand the role of each component in a solar irrigation installation.
Solar Panels
Generate the electrical energy required to operate the pump. Their total wattage must match the pumping system’s requirements and local solar conditions.
Water Pump
Moves water from a well, reservoir, tank, or other suitable source. The pump must deliver the required flow at the calculated total head.
Pump Controller
Controls pump operation and may provide overload, dry-running, or other protections, depending on the model.
Pipes and Valves
Carry water from the source to the field. Correct pipe sizing helps reduce friction losses and maintain suitable water pressure.
Filters
Remove particles that could clog drip emitters or other irrigation components. Filter selection depends on the water source and irrigation method.
Mounting and Protection
Provide secure panel support, suitable cables, electrical isolation, overcurrent protection, grounding, and other required safety equipment.
Depending on the installation, you may also need a water storage tank, pressure sensor, float switch, flow meter, battery, inverter, or automated irrigation controller.
3. Plan Your Farm’s Water Requirements
The most important step in designing solar-powered irrigation is determining how much water your crops need and when that water must be delivered.
Requirements vary according to crop type, soil, climate, growing stage, irrigation efficiency, and rainfall. A small vegetable plot and a large orchard may need very different pumping capacities.
Step 1: Calculate the Daily Water Demand
Estimate the total volume of irrigation water required each day during the period of highest demand.
For example, suppose a farm needs 20,000 liters of water per day.
Daily water demand: 20,000 liters
Equivalent volume: 20 cubic meters
Target pumping period: 5 hours
Required average flow = 20,000 ÷ 5 = 4,000 liters per hour
This is only an example. Your farm may need more or less water, and the pump must achieve the required flow at the actual pumping head.
Step 2: Identify the Water Source
Determine whether the water comes from a borehole, dug well, pond, river intake, reservoir, or storage tank.
For a well, measure the water level while pumping when possible. The water level can fall during operation, increasing the pumping lift. Also verify the well’s sustainable yield so that the pump does not withdraw water faster than the source can replenish it.
Step 3: Measure the Elevation Difference
Calculate the vertical distance between the pumping water level and the delivery point. Add the pressure requirement of the irrigation equipment and the friction losses in pipes, filters, fittings, and valves.
Step 4: Consider Seasonal Conditions
Design for the period when crops require the most water, not only for a mild-weather month. Seasonal sunlight, cloud cover, crop growth, and water availability all influence the system’s performance.
4. How to Size a Solar Water Pump
Correct pump sizing is essential because a pump that is too small may not deliver enough water, while an oversized pump may cost more than necessary and operate inefficiently.
Understand Flow Rate
Flow rate describes the amount of water delivered over a period of time. It may be expressed in liters per minute, liters per hour, or cubic meters per hour.
- 1 cubic meter = 1,000 liters.
- 1 cubic meter per hour = approximately 16.7 liters per minute.
- Daily water demand divided by effective pumping hours gives the target average flow rate.
Understand Total Dynamic Head
Total dynamic head (TDH) represents the total energy the pump must provide to move water through the system. It includes vertical lift, required delivery pressure, and hydraulic losses.
TDH ≈ Static Head + Pressure Head + Friction Losses
Use a hydraulic calculation or a qualified irrigation designer to determine the actual total dynamic head for your installation.
For pressure conversion, approximately 10.2 meters of water head corresponds to 1 bar of pressure. The exact relationship depends on the water’s density and the pressure reference.
Example: Estimate Hydraulic Pumping Power
Suppose the target flow rate is 4 cubic meters per hour and the total dynamic head is 30 meters.
The approximate hydraulic power can be calculated using:
P = ρ × g × Q × H
Where:
- ρ = water density, approximately 1,000 kg/m³
- g = gravitational acceleration, approximately 9.81 m/s²
- Q = flow rate in cubic meters per second
- H = total dynamic head in meters
Converting 4 cubic meters per hour to cubic meters per second gives approximately 0.00111 m³/s.
Using a total head of 30 meters, the hydraulic power is approximately 327 watts.
This is hydraulic power, not the electrical power required by the pump. The pump and motor require additional energy to account for their combined efficiency. Solar array sizing must also account for controller losses, temperature, sunlight conditions, and operating requirements.
Use the manufacturer’s pump performance curves to verify that the selected model can deliver the required flow at the calculated head.
5. Calculate the Solar Panel Capacity
Once the pump’s electrical energy requirement is known, estimate the solar array size needed to supply that energy during the available sunlight hours.
Solar panel capacity is measured in watts or kilowatts. Daily energy production is measured in watt-hours or kilowatt-hours.
A Practical Solar Sizing Formula
PV Array Size (W) ≈ Daily Energy Demand (Wh) ÷ [Peak Sun Hours × Performance Ratio]
The performance ratio accounts for real-world losses. It is an estimate that should be refined for local conditions, equipment, and system design.
Example Calculation
Suppose a pump and its controls require an estimated 3,000 Wh of electrical energy per day. Assume the site receives an average of 5 peak sun hours per day and use an illustrative performance ratio of 0.75.
Daily electrical energy: 3,000 Wh
Peak sun hours: 5
Assumed performance ratio: 0.75
Estimated PV array size = 3,000 ÷ (5 × 0.75) = 800 W
An 800 W array is the mathematical estimate for these assumptions, not a guaranteed recommendation for every 3,000 Wh pumping load. Motor starting requirements, pump-controller specifications, temperature, seasonal sunlight, and operating schedules may require a larger array.
Calculate the Number of Solar Panels
If the preliminary array target is 800 W and each panel is rated at 400 W, the basic arithmetic gives:
800 W ÷ 400 W = 2 panels
However, two panels are suitable only if their combined electrical characteristics meet the controller’s required operating voltage, current, and power range. The final panel configuration must follow the pump and controller manufacturer’s specifications.
Do not size a solar array from pump wattage alone. Check the controller’s minimum and maximum PV voltage, maximum input current, permissible array power, and the pump’s startup and operating requirements. A qualified installer should verify the final configuration.
6. Step-by-Step Solar Panel Installation for Farm Irrigation
After confirming the water requirements and selecting compatible equipment, follow a structured installation plan.
Step 1: Select the Installation Location
Choose a location with strong sunlight throughout the day and minimal shading from trees, buildings, poles, or other obstacles.
Place the panels where they can be accessed safely for inspection and cleaning. Avoid areas exposed to flooding, vehicle impacts, or unnecessary interference with farm machinery.
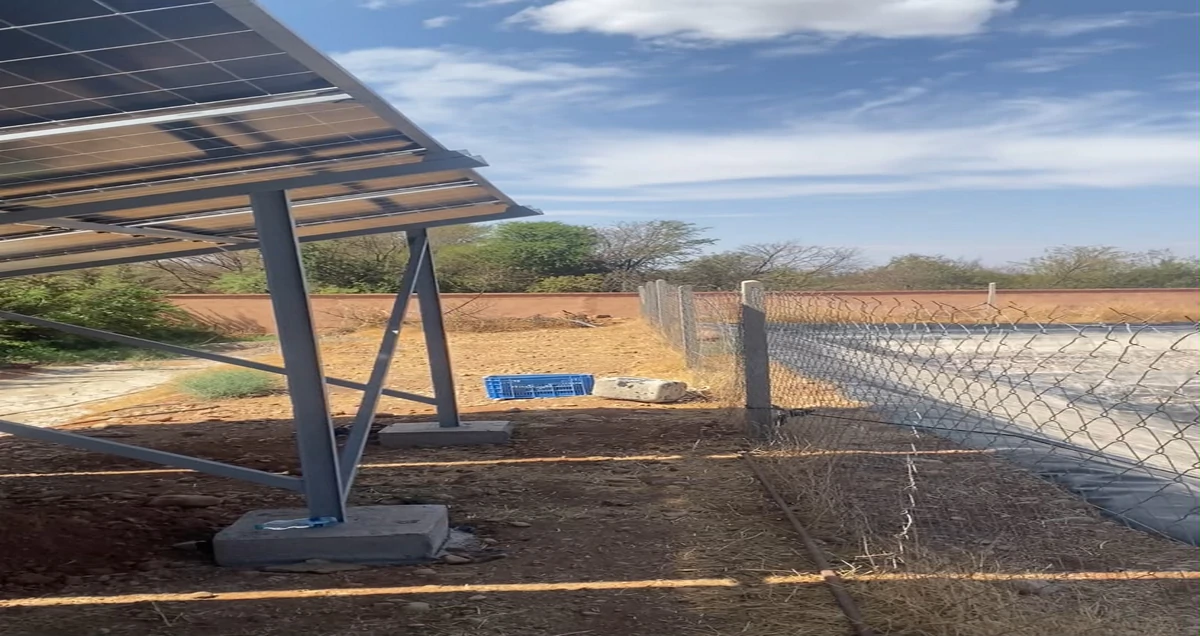
For a ground-mounted system, use a support structure designed for local wind conditions and the soil at the installation site.
Step 2: Install the Mounting Structure
Install the solar mounting structure according to the manufacturer’s instructions and local requirements. Secure all fasteners and verify that the structure can withstand expected wind loads.
Choose the panel tilt and orientation according to the location, seasonal solar conditions, and the irrigation schedule. A solar professional can optimize the layout for the site’s latitude and seasonal requirements.
Step 3: Mount the Solar Panels
Attach the panels using approved mounting hardware. Leave adequate access for maintenance and avoid placing equipment where runoff or soil movement can undermine the supports.
Do not drill into panel frames or modify mounting points unless the manufacturer explicitly permits it.
Step 4: Install the Pump and Controller
Install the pump in the correct position for its design, whether it is a submersible well pump or a surface-mounted pump.
Mount the controller in a location that meets its ventilation, temperature, moisture, and enclosure requirements. Use the specified cable sizes, protection devices, and connection methods.
Step 5: Install the Water Pipes
Use pipes rated for the expected flow and operating pressure. Keep the route practical, avoid unnecessary bends, and provide appropriate valves and fittings.
Install filters when required by the irrigation method. Drip systems often need effective filtration to prevent emitters from becoming blocked.
Step 6: Install Electrical Protection
Solar pump systems may require DC isolators, overcurrent protection, surge protection, grounding or earthing, and other protective equipment, depending on the system design and applicable electrical code.
Use weather-appropriate enclosures and connectors. DC circuits can remain energized in sunlight, so panel wiring and controller connections must be handled by a qualified person using suitable procedures and equipment.
Step 7: Connect the Solar Array
Verify the polarity and electrical ratings before connecting the array to the controller. Check the expected open-circuit voltage under the coldest applicable conditions and ensure that the total voltage and current remain within the controller’s limits.
Do not disconnect energized PV connectors under load unless the equipment is specifically designed for that operation and the manufacturer’s instructions permit it.
Step 8: Test the Pumping System
After installation and electrical checks, test the system under suitable operating conditions.
- Confirm that the pump starts and operates as specified.
- Measure the actual water flow rate.
- Check the delivery pressure where relevant.
- Inspect pipes, fittings, and valves for leaks.
- Verify that protective controls work correctly.
- Confirm that the daily water target can be met under realistic sunlight conditions.
Record the results so that you can compare future performance and identify changes in output.
7. Choose the Right Irrigation Method
The best irrigation method depends on crop type, soil, field layout, water quality, and the amount of pressure required.
| Irrigation Method | Typical Applications | Important Considerations |
|---|---|---|
| Drip irrigation | Vegetables, orchards, vineyards, and row crops. | Requires suitable filtration and pressure control. |
| Sprinkler irrigation | Selected field crops and pasture. | Pump must supply the required pressure and flow. |
| Surface irrigation | Suitable fields with appropriate slopes and soil conditions. | Requires careful water distribution and field management. |
| Water storage and gravity feed | Farms that can deliver stored water from an elevated tank. | Available pressure depends on the height difference and pipe losses. |
Drip irrigation can reduce water losses in suitable agricultural applications, but the result depends on correct design, filtration, maintenance, and scheduling. It does not eliminate the need to calculate the pump’s flow and pressure requirements.
8. Should You Use a Water Tank or Battery?
A solar irrigation system can store energy in a battery or store pumped water in a tank. The best choice depends on when the crops need water and how the system operates.
Option 1: Store Water in a Tank
With water storage, solar electricity operates the pump when sunlight is available. The pump moves water into a tank or reservoir, and irrigation can take place later.
Advantages can include simpler energy storage requirements and the ability to irrigate during periods when solar production is low.
However, the tank must have sufficient capacity, a suitable location, and enough elevation or a separate pressure system to deliver water effectively.
Option 2: Store Electricity in Batteries
A battery-based system stores electricity for use when solar production is insufficient. It may be useful when irrigation needs to occur at specific times or when a compatible pump requires power beyond daylight hours.
Batteries add cost, weight, charging equipment, and maintenance considerations. Their usable capacity, power rating, temperature limits, and expected cycle life must be considered.
For many agricultural applications, pumping water into a suitably sized storage tank during sunny hours is worth evaluating before adding battery storage. However, tank elevation, land availability, pressure requirements, and the irrigation schedule can change the result. Compare the complete costs and operational needs of both approaches.
9. Maintenance and Troubleshooting
Regular maintenance helps keep a solar irrigation system operating reliably throughout the growing season.
Clean the Solar Panels When Necessary
Dust, mud, bird droppings, and other deposits can reduce panel output. Inspect the panels regularly and clean them according to the manufacturer’s instructions and local water conditions.
In dusty agricultural regions, check for buildup after dry and windy periods. Avoid abrasive materials, unsuitable chemicals, and cleaning methods that could damage the glass or electrical components.
Inspect the Pump and Pipes
Check for leaks, unusual noise, reduced flow, vibration, and signs of wear. Inspect filters and clean them as needed.
Monitor Water Output
Record the daily pumping volume or operating time. A noticeable decline can indicate reduced sunlight, panel contamination, a changing well water level, a blocked filter, a pipe leak, or a pump problem.
Common Problems and Possible Causes
| Problem | Possible Causes | What to Check |
|---|---|---|
| Pump does not start | Insufficient sunlight, electrical fault, controller protection, or pump failure. | Controller indicators and electrical readings checked by a qualified person. |
| Low water flow | Blocked filter, reduced sunlight, low water level, or incorrect pump sizing. | Filter condition, water level, actual flow, and operating head. |
| Pump stops repeatedly | Clouds, dry-running protection, overheating, or control faults. | Fault indicators, water availability, and operating conditions. |
| Uneven crop watering | Uneven pressure, clogged emitters, leaks, or poor system layout. | Filters, emitters, valves, pressure, and pipe layout. |
Never open energized electrical equipment or work on pump wiring without the required qualifications and safety procedures.
10. Costs and Long-Term Savings
The cost of a solar irrigation system depends on the pump’s capacity, solar array size, installation location, pipework, water source, storage requirements, and electrical protection.
A small system supplying a garden or modest plot will generally have different equipment requirements from a large installation irrigating several hectares.
Main Cost Factors
- Solar panels and mounting structure.
- Water pump and compatible controller.
- Electrical cables, protection, and installation labor.
- Water pipes, valves, filters, and irrigation equipment.
- Water storage tanks or reservoirs, if needed.
- Batteries and an inverter, if the selected design requires them.
- Maintenance, repairs, and eventual equipment replacement.
How to Estimate Financial Savings
Compare the expected lifetime cost of solar pumping with the cost of operating the current system.
For a diesel pump, include fuel, transport, servicing, repairs, and downtime. For an electric pump, include electricity charges, fixed charges where relevant, and maintenance.
Payback Period = Initial Investment ÷ Annual Net Savings
Annual net savings should account for ongoing solar-system maintenance and any other operating costs. This simple calculation does not include financing, discount rates, or changes in energy prices.
Solar pumping may be particularly attractive where diesel fuel is expensive or the grid is unavailable. However, the financial outcome depends on the local cost of equipment, water demand, current pumping expenses, and system performance.
Request itemized quotes and compare systems designed for the same water flow, pumping head, and operating schedule.
11. Common Solar Irrigation Installation Mistakes
1. Buying Panels Before Sizing the Pump
Start with water demand and total pumping head. Then select the pump and calculate the array needed to operate it.
2. Ignoring the Seasonal Water Requirement
A system that works during a cool month may not provide enough water during the hottest part of the growing season.
3. Underestimating Pipe Losses
Long, narrow, or poorly designed pipes can increase friction losses and reduce the flow delivered to crops.
4. Using an Incompatible Controller
Solar pumps and controllers have specific voltage, current, and power requirements. Compatibility must be verified before purchase.
5. Forgetting Filtration
Water containing sediment or other particles can clog drip emitters and damage some irrigation equipment.
6. Overlooking Electrical Safety
Outdoor solar installations need appropriate wiring, protection, grounding, weather resistance, and qualified installation practices.
7. Ignoring the Water Source’s Sustainable Yield
A powerful pump cannot compensate for a well or reservoir that cannot supply the required volume sustainably.
12. Frequently Asked Questions
1. How many solar panels are needed for farm irrigation?
The number depends on the pump’s electrical consumption, daily pumping hours, available sunlight, and controller requirements. Calculate the required array wattage first, then divide by the panel rating and verify the permitted electrical configuration.
2. Can solar panels run a water pump directly?
Some solar pumping systems are designed to operate from a compatible PV array through a dedicated controller. Other pumps require an inverter or a different configuration. Follow the manufacturer’s electrical specifications.
3. Can a solar irrigation system work on cloudy days?
Solar panels can still generate electricity in cloudy conditions, but output is generally reduced. The pump may deliver less water or operate for fewer hours. Water storage and an appropriately designed backup system can help address variable conditions.
4. Is battery storage necessary for solar irrigation?
Not always. Some systems pump water during daylight hours and store it in a tank for later irrigation. Batteries may be appropriate when the operating schedule or pump requirements make electrical storage beneficial.
5. Is solar irrigation suitable for drip irrigation?
Yes, when the pump can provide the required flow and pressure. The system may also need filtration, pressure regulation, valves, and a suitable irrigation schedule.
6. How do I calculate the required water pump capacity?
Divide the daily water demand by the effective pumping hours to estimate the target average flow. Then calculate total dynamic head, including vertical lift, delivery pressure, and friction losses, and select a pump that meets both requirements.
7. How long do solar panels last in agricultural installations?
Panel service life depends on product quality, environmental exposure, installation, and maintenance. Check the manufacturer’s performance warranty and product warranty rather than assuming all panels have identical lifespans.
8. Can solar irrigation reduce farm operating costs?
It can reduce spending on grid electricity or diesel pumping, depending on the existing system and local conditions. Actual savings depend on the initial investment, water demand, solar production, maintenance, and financing.
Conclusion: Is Solar Panel Installation Worth It for Farm Irrigation?
Solar panel installation for farm irrigation can provide a practical way to power water pumps, reduce dependence on conventional energy sources, and support reliable crop watering where the system is properly designed.
The most important factors are daily water demand, total pumping head, pump performance, solar array capacity, irrigation pressure, and seasonal sunlight availability. Water storage can also help separate daytime solar pumping from the time when crops actually need irrigation.
Before investing, calculate your farm’s water requirements, verify the pump and controller specifications, and obtain an installation design that accounts for electrical protection and local conditions.
A properly sized system can support agricultural productivity while making better use of available sunlight. The key is to design around the farm’s real water needs rather than choosing equipment based on panel wattage alone.
Plan Your Solar Irrigation System
Start with your daily water demand, calculate the pumping head, and select compatible solar equipment to build a reliable irrigation solution for your farm.
Disclaimer: This article is for educational purposes and does not replace a site-specific irrigation or electrical design. Pump sizing, wiring, grounding, overcurrent protection, and installation must comply with manufacturer instructions and applicable local regulations. Consult qualified professionals for well systems, high-voltage equipment, and electrical connections.