
How to Build a DIY Adjustable Solar Panel Stand (Step-by-Step Guide)
A DIY adjustable solar panel stand can help you position solar panels toward the sun while keeping your solar installation organized and accessible. Unlike a fixed mounting structure, an adjustable stand allows you to change the panel angle when needed, depending on the design and your local sunlight conditions.
For homeowners, campers, workshops, and off-grid enthusiasts, a homemade solar mounting rack can be an interesting project. However, the frame must safely support the panels and withstand wind, weather, and the weight of the equipment.
In this guide, you will learn how to plan an adjustable solar panel stand, select suitable materials, design a stable frame, choose an appropriate tilt angle, and avoid common installation mistakes.
What Is a DIY Adjustable Solar Panel Stand?
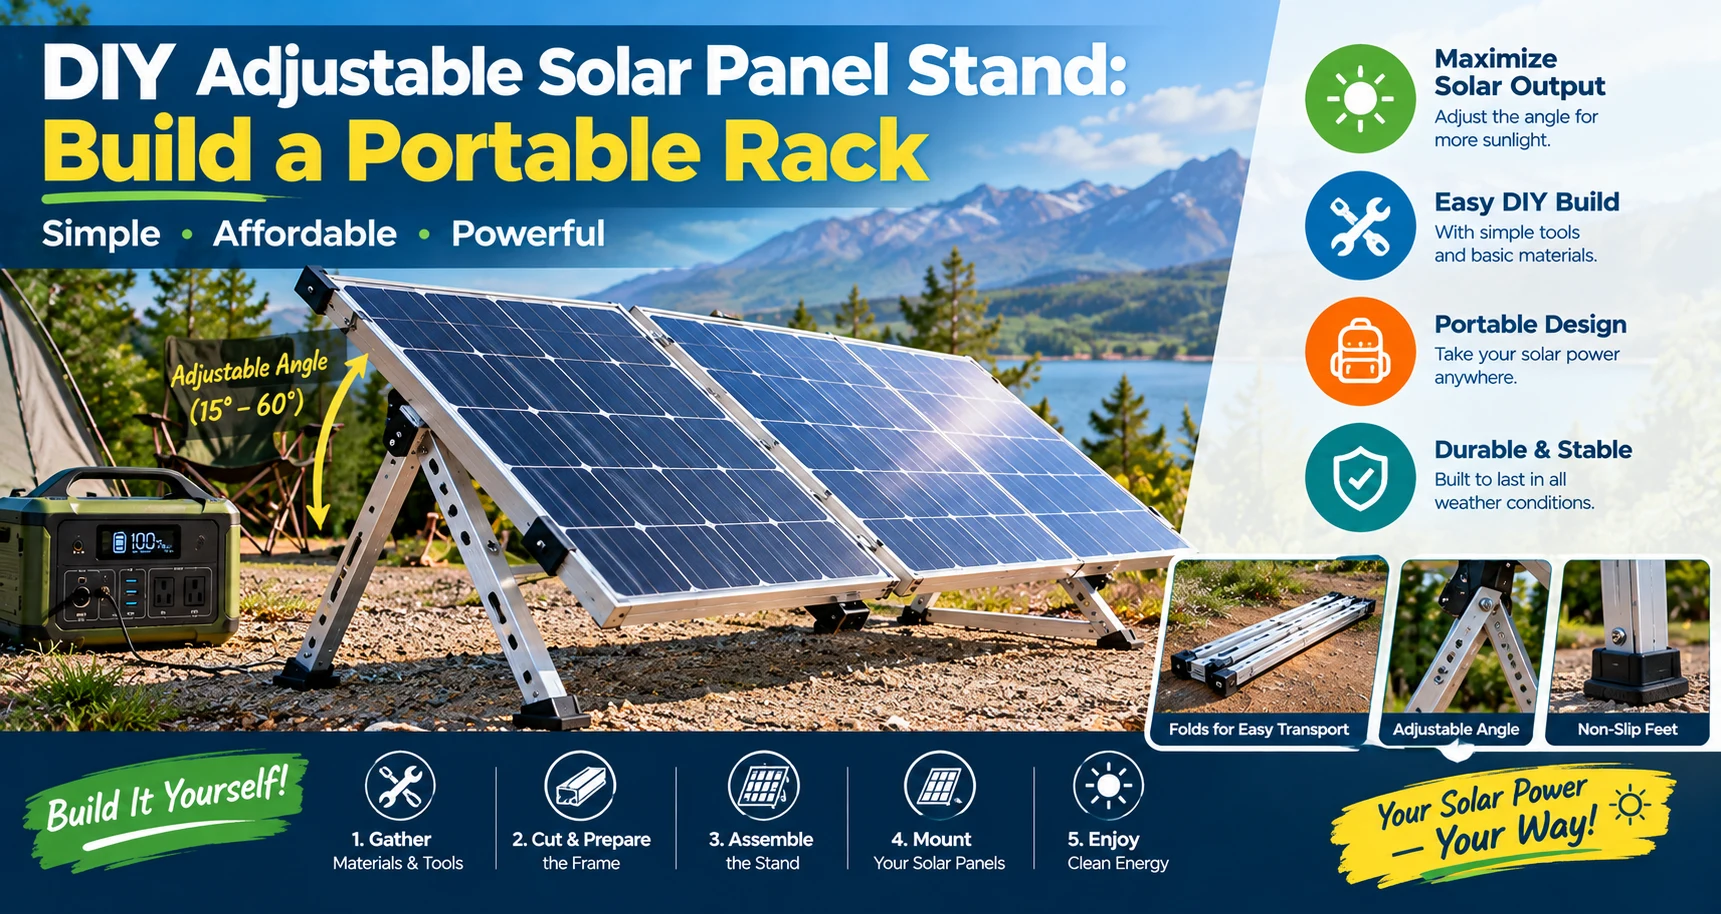
A DIY adjustable solar panel stand is a mounting structure that supports photovoltaic modules and allows their tilt angle or orientation to be changed. Depending on the design, the frame may be made from wood, steel, or aluminum.
Some stands are stationary, while others use wheels for repositioning on suitable surfaces. A wheeled stand must be designed carefully because solar panels can catch strong winds, potentially causing the structure to move or tip over.
The example shown in the reference image uses a tall wooden frame to support several rows of solar panels at different angles. It demonstrates one possible concept, but the exact dimensions, load capacity, and stability cannot be determined from the image alone.
Why Build an Adjustable Solar Panel Rack?
1. Adjust the Panel Tilt
The angle of a solar panel affects how directly sunlight reaches its surface. An adjustable rack can make it possible to change the tilt according to seasonal sunlight patterns or the installation’s requirements.
The best angle depends on latitude, roof or ground conditions, weather, shading, and whether the goal is to maximize annual production or improve output during a particular season.
2. Make Small Solar Systems Easier to Organize
A purpose-built stand can keep panels aligned and provide space for mounting hardware and cable routing. This may be useful for small workshops, demonstration systems, and selected off-grid applications.
3. Improve Access for Inspection
A well-planned rack may make certain inspection tasks easier. However, panels should never be adjusted while the frame is unstable or while someone is working beneath an unsecured structure.
4. Support a DIY Solar Project
Building a mounting stand can help you understand panel positioning, structural design, and solar installation requirements. The finished structure must still meet appropriate safety standards and the manufacturer’s mounting instructions.
Materials Needed for a DIY Solar Panel Stand
The correct materials depend on the size and number of panels, the installation location, expected wind exposure, and the desired adjustment mechanism.
- Structural frame: Properly graded timber, steel, or aluminum suitable for the intended loads and environment.
- Solar mounting rails: Compatible rails or mounting hardware designed to secure the photovoltaic modules.
- Bracing: Diagonal supports and structural connectors selected for the design.
- Fasteners: Appropriate bolts, screws, washers, and connectors compatible with the frame materials.
- Tilt adjustment hardware: Rated brackets, locking pins, or another secure mechanism designed to hold the selected angle.
- Base and anchoring system: A stable foundation or anchoring arrangement suited to the site.
- Corrosion and weather protection: Appropriate finishes and protective measures for the selected materials.
- Cable management: Suitable clips, conduits, or supports to protect wiring from abrasion and movement.
- Optional wheels: Load-rated wheels with reliable locking mechanisms, if mobility is required and the structure is designed for it.
Do not select structural components based only on appearance. A frame that supports the static weight of solar panels may still fail under wind loads or repeated movement.
Step-by-Step Guide to Planning Your Solar Panel Stand
Step 1: Determine the Solar Array Size
Start by recording the dimensions and weight of each panel. Check the manufacturer’s installation instructions for approved support locations, clamping zones, and mounting requirements.
Calculate the total rated capacity using this formula:
Total solar capacity (kW) = Number of panels × Panel wattage (W) ÷ 1,000
For example, four 400-watt panels have a combined rated capacity of:
4 × 400 ÷ 1,000 = 1.6 kW
This is the array’s nominal DC capacity, not a guarantee of its actual power output. Production changes with sunlight, temperature, shading, orientation, and system losses.
Step 2: Choose a Suitable Location
Select a location with good access to sunlight throughout the day. Check for trees, buildings, walls, and other obstructions that may cast shadows on the panels.
The ground should be suitable for supporting the structure. Avoid locations prone to flooding, erosion, unstable soil, or other conditions that could compromise stability.
Leave enough space for inspection, cleaning, cable routing, and safe access around the array.
Step 3: Choose the Frame Material
Wood may be accessible for a small DIY project, but it must be suitable for outdoor exposure and protected against moisture and deterioration. Metal frames can offer durability, but their design must account for corrosion, connections, and structural loading.
For larger arrays, tall structures, or locations exposed to strong winds, obtain a design from a qualified professional rather than relying on an improvised frame.
Step 4: Plan the Base and Bracing
The base distributes the structure’s loads and helps prevent tipping. Diagonal bracing can improve rigidity, but the required arrangement depends on the frame geometry and the loads it must withstand.
Plan the anchoring system before building the frame. Wheels alone are not an adequate anchoring method for a solar rack exposed to wind.
Step 5: Design the Tilt Adjustment Mechanism
The adjustment system must hold the panels securely at the selected angle. Use components rated for the expected loads and ensure that the locking mechanism cannot release accidentally.
Provide a safe way to adjust the frame without placing hands or other body parts in pinch points. Never loosen a support while the panels are relying on it to remain upright.
Step 6: Install Compatible Panel Mounting Hardware
Secure the panels using mounting hardware approved for the module design. Follow the manufacturer’s instructions for clamp placement, fastening requirements, and support points.
Avoid drilling into the panel frame or modifying the module unless the manufacturer explicitly permits the procedure. Incorrect attachment can damage the panels and may invalidate the warranty.
Step 7: Secure and Inspect the Wiring
Route cables so that they cannot rub against sharp edges, become trapped in moving parts, or hang where they can be pulled or damaged.
Use compatible connectors and appropriately rated electrical equipment. Solar modules can produce electricity whenever illuminated, so electrical work should be performed by someone qualified to handle the system safely.
Step 8: Check Stability Before Operation
Before using the stand, verify that all structural connections, mounting points, braces, and adjustment locks are secure. Check that the array remains stable at every permitted tilt setting.
Have the structure assessed for the wind and weather conditions expected at the installation site. Do not use the stand if it rocks, shifts, bends unexpectedly, or has loose connections.
How to Choose the Right Solar Panel Tilt Angle
Solar panel tilt affects how sunlight reaches the modules. A fixed angle is often simpler and requires less maintenance, while an adjustable stand offers flexibility at the cost of additional moving parts and structural complexity.
For a fixed installation, the optimal tilt depends on the site’s latitude and energy goals. A local solar resource tool or qualified installer can help estimate the most suitable orientation and angle.
For seasonal adjustment, the tilt may be changed to favor the sun’s position at different times of year. However, any adjustment should follow the mounting system’s approved settings and should only be performed when conditions are safe.
There is no single tilt angle that maximizes production at every location. Local conditions and the system’s intended use should guide the decision.
Should You Add Wheels to a Solar Panel Stand?
Wheels can make a small solar rack easier to move on smooth, level ground. Nevertheless, adding wheels also introduces important safety considerations.
- Choose wheels rated for the complete structure’s weight.
- Use reliable locking mechanisms when the rack is stationary.
- Make sure the frame cannot tip or roll unexpectedly.
- Do not reposition the stand in strong winds.
- Secure the array against wind loads using an appropriate anchoring system.
- Protect cables from stretching, crushing, and damage during movement.
A tall, multi-panel structure can act like a sail when exposed to wind. If the rack is large or elevated, professional structural design is strongly recommended.
Common DIY Solar Stand Mistakes
Using a Frame That Is Too Weak
Thin timber, unsuitable connectors, or inadequate bracing can allow the structure to bend or collapse. The design must account for the complete panel array and environmental loads.
Ignoring Wind Exposure
Solar panels present a broad surface to the wind. A stand that appears stable in calm conditions may become dangerous during a gust. Appropriate structural design and anchoring are essential.
Choosing the Wrong Tilt Mechanism
An improvised support may slip when the panel angle changes. Use secure, load-rated adjustment hardware that cannot release unintentionally.
Leaving Electrical Cables Exposed
Unsecured wiring may be damaged by movement, abrasion, water exposure, or contact with structural edges. Follow the cable and connector manufacturers’ installation requirements.
Making the Stand Too Tall
Increasing height can complicate structural design and increase exposure to wind. Choose the lowest practical configuration that meets the system’s functional requirements while providing appropriate access and clearance.
Forgetting Maintenance
Outdoor structures need periodic inspection. Check the frame, fasteners, protective coatings, panel mounting hardware, cable supports, and anchoring system according to the maintenance plan.
Is a DIY Adjustable Solar Panel Stand Worth It?
A DIY stand may be appropriate for a small project when the builder has the necessary skills, uses compatible mounting hardware, and can provide a safe and stable structure.
However, the cost of materials is only one part of the decision. You should also consider the time required, structural safety, weather resistance, maintenance, and any local requirements that apply to the installation.
For large arrays, tall frames, permanent outdoor installations, or sites with strong winds, a commercially engineered mounting system may be a better choice.
Frequently Asked Questions
Can I build a solar panel stand out of wood?
Wood can be used for some small solar mounting projects if it is suitable for outdoor exposure and the complete structure is adequately designed. The frame must safely support the panels and withstand expected environmental loads.
Can I make a solar panel stand adjustable?
Yes. A suitable design can use rated brackets, locking pins, or other secure adjustment hardware. The mechanism must hold the array firmly at every permitted setting.
Are wheels a good idea for solar panel stands?
Wheels can help with repositioning small racks on suitable surfaces. They do not replace anchoring or structural protection against wind, and the stand must not be moved in unsafe conditions.
Does changing the panel angle improve solar production?
It can improve the amount of sunlight reaching the modules under certain conditions. The benefit depends on the sun’s position, weather, shading, and the existing panel orientation.
How many solar panels can one stand support?
The number depends on the frame’s engineered load capacity, panel dimensions, mounting arrangement, and environmental conditions. Do not determine capacity from the frame’s appearance alone.
Can a DIY stand be used for an off-grid solar system?
Yes, if the mounting structure is appropriate for the array and the rest of the system is correctly designed. The battery, charge controller, inverter, wiring, and protection equipment must be compatible with the panels and the intended loads.
Conclusion
A DIY adjustable solar panel stand can be a useful way to organize solar modules and change their tilt when necessary. With suitable materials, compatible mounting hardware, and careful planning, a small project can provide a practical learning experience for solar enthusiasts.
However, structural stability and electrical safety should always come first. Account for wind exposure, secure the frame properly, protect the wiring, and follow the solar panel manufacturer’s installation instructions.
For larger or elevated installations, consult qualified professionals to ensure the structure is safe for the intended site and operating conditions.
Disclaimer: This article is for educational purposes only. Structural and electrical requirements vary by location and installation. Obtain qualified professional advice where necessary, and follow applicable building codes, electrical regulations, and equipment instructions.